

A laptop on a desk can look clean until the cables, charger, notebook, keyboard, and coffee mug claim the rest of the surface. More importantly, the built-in display often sits far below eye level, asking your neck to do extra work through every meeting, edit, and late-night session. The right laptop mounting options change both problems at once: they lift your screen, reclaim usable desk space, and give the setup a more intentional presence.
The best choice is not always the most complex one. It depends on how you work, whether you use an external monitor, how often you adjust your position, and how much flexibility your desk can support. A premium workspace should feel composed from the first login to the final task of the day.
Why Mounting a Laptop Changes the Way You Work
Screen height matters because your body adapts to whatever is directly in front of it. When a laptop sits flat, most people angle their head down and round their shoulders forward. Over a long workday, that position can turn a capable machine into the weak point of an otherwise thoughtful setup.
Raising the laptop screen closer to eye level encourages a more upright posture. It also creates room beneath the device for a keyboard, mouse, charging gear, or simply more visual space. The result is not just a tidier desk. It is a desk that makes focused work feel easier to sustain.
There is also an aesthetic advantage. A mounted laptop gives the workstation a sense of structure. Instead of treating your computer as an object parked on the desktop, it becomes part of a balanced display system. That distinction matters to professionals, creatives, and gamers who want their workspace to perform as well as it looks.
Laptop Mounting Options That Fit Different Setups
Desk-Mounted Laptop Arm
A desk-mounted laptop arm is the most adaptable choice for people who want true adjustability. It clamps or bolts to the desk, then supports the laptop on a dedicated tray or platform. Depending on the arm, you can raise, lower, tilt, rotate, and pull the computer toward or away from you.
This option is especially strong for hybrid workers who move between seated and standing positions, or for anyone sharing a desk with another user. Set the screen at a comfortable viewing height during focused work, then shift it lower when you need to use the laptop keyboard directly.
The trade-off is compatibility. Check the tray dimensions, laptop weight range, desk thickness, and edge construction before buying. A heavy-duty arm is only as secure as the surface it attaches to. Solid desks with a clear mounting edge are ideal, while hollow-core tops and fragile glass surfaces may need a different approach.
Laptop-Monitor Mounts
For a dual-screen workflow, a laptop-monitor mount is often the cleanest answer. It combines a monitor arm and laptop tray on a single base, placing both screens at a coordinated height. This setup is built for people who spend their day comparing documents, managing dashboards, editing video, designing, coding, or keeping a video call visible beside their main work.
The key is alignment. Your primary monitor should typically sit directly in front of you, with the laptop display positioned beside it as a secondary screen. If both displays are the same height, the visual field feels more natural and the desk looks immediately more refined.
Choose a mount with independent adjustment for each arm. Laptop displays and external monitors rarely weigh the same, and they may need different positions to create a comfortable viewing angle. A shared base saves space, but independent control preserves the ergonomic benefit.
Monitor Arm With a Laptop Tray
If you already own a quality monitor arm, a compatible laptop tray may be the most efficient upgrade. This approach uses the arm's existing VESA connection to support your laptop, turning a single-display setup into a flexible laptop workstation.
It works particularly well for compact desks, apartments, and minimalist setups where every inch counts. With the laptop floating above the work surface, you gain room for the accessories that keep your day moving.
Before choosing this route, confirm that the monitor arm can safely carry the laptop and tray together. Weight capacity is not a detail to overlook. Look beyond the listed maximum and leave a reasonable margin, especially if your laptop is a larger model or you plan to reposition it frequently.
Fixed Laptop Stands and Risers
A fixed stand or riser is the straightforward option for users who want elevation without an articulated arm. It can be a smart fit for a dedicated home office where the desk layout rarely changes. The structure is simple, the footprint is predictable, and setup takes minutes.
The limitation is adjustability. A fixed riser may put the screen at a better height, but it cannot move with you when you switch tasks, chairs, or working positions. It also leaves the laptop closer to the desktop than a full mount, so it does less to open the visual space beneath the screen.
For many users, a riser is an excellent entry point. For those building a long-term workstation with an external keyboard, mouse, and monitor, an adjustable arm usually delivers a more complete result.
Choose Based on Your Work, Not Just Your Desk
Start with your primary display. If the laptop is your only screen, a single laptop arm or fixed riser can create a cleaner, more comfortable focal point. If you rely on an external monitor, a laptop-monitor mount is usually the stronger investment because it organizes both screens as one system.
Then consider how often your setup needs to move. Designers who shift between portrait references and landscape timelines, remote workers who alternate between sitting and standing, and gamers who use the desk for more than one purpose will appreciate an arm with broad adjustment. A fixed stand is better suited to a stable routine with few changes.
Your peripherals matter too. Once the laptop screen is raised, plan to use an external keyboard and mouse for extended work. Reaching upward to type on a mounted laptop defeats much of the ergonomic improvement. The goal is to bring the screen up while keeping your hands in a relaxed, neutral position below.
Finally, look at the desk as a whole. A premium mounting solution should reduce visual noise, not add more of it. Clean cable routing, a stable clamp, and a finish that complements the rest of the setup help the hardware feel integrated rather than improvised. This is where thoughtful engineering earns its place. Alberenz designs workspace hardware around that balance of performance, durability, and clean modern form.
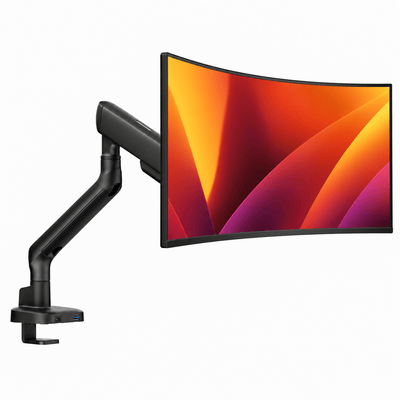
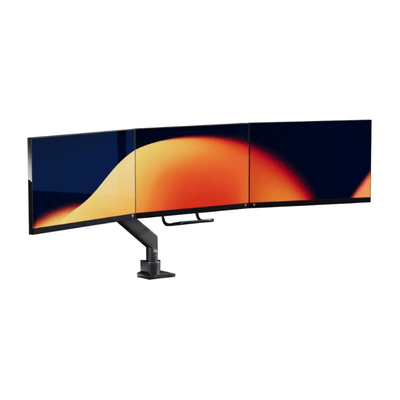
Nuestros soportes de monitor

Get the Position Right After Installation
A mount can be well built and still feel wrong if it is poorly positioned. Place your main screen approximately an arm's length away, then set the top portion of the display around eye level or slightly below it. The ideal height can vary with your chair, eyesight, and task, but you should not need to crane your neck to see the center of the screen.
Keep the laptop level or slightly tilted back to reduce glare. If you are using two screens, avoid placing them so far apart that you repeatedly turn your head through a wide range. A gentle inward angle keeps both displays within a comfortable line of sight.
Take a few days to refine the position. Ergonomics is not a single measurement. It is how the setup feels after a full week of real work. Small adjustments to screen height, monitor distance, and keyboard placement often make the difference between a desk that looks good and one that genuinely supports you.
The right mount gives your laptop a proper place in the workspace. Choose the one that fits your workflow, secure it to a desk that can support it, and make room for better work to happen.